

Key Takeaways
Why Some Rooms Stay Dark - and What You Can Control
A room's perceived brightness depends on three factors working together: the amount of natural light entering the space, how well that light is reflected around the room, and the color and finish of the surfaces it hits. Rooms feel dark when one or more of these factors is working against you - a north-facing orientation, small or obstructed windows, deep wall colors, or matte surfaces that absorb rather than scatter light.
The good news is that most of these variables are within a homeowner's control without structural renovation. Changing window treatments, repainting walls, repositioning mirrors, and swapping out a few furnishings can transform a dim room into one that feels open and welcoming. Understanding the 'why' behind each step makes it easier to prioritize where to invest your effort first.
Paint samples and swatch cards
Test colors on your actual walls in varying light conditions before purchasing full quantities.
Measuring tape
Measure wall space and window dimensions to size mirrors, curtain rods, and furniture correctly.
Large wall mirror (leaning or hung)
Reflects and distributes natural and artificial light across the room.
Sheer or light-filtering window panels
Replace heavy drapes to allow maximum daylight while maintaining privacy.
Metallic or glossy accent pieces
Small decorative objects with reflective surfaces that scatter light into shadowed corners.
LED bulbs with high CRI (color rendering index)
Produce light that renders colors accurately and closely mimics natural daylight.
If you're also dealing with a small footprint alongside poor lighting, the two problems compound each other - our furniture arrangement guide for small living rooms addresses how layout choices affect both light flow and perceived space.
Step-by-Step: Brightening Your Room
Audit your existing window treatments
Stand in the room at different times of day and identify what is physically blocking light from entering. Heavy drapes, dark Roman shades, and furniture pushed against windows are common culprits. Remove or pull back all window coverings and notice the immediate difference - this is your baseline.
Replace heavy panels with sheer linen or light-filtering fabric that allows diffused daylight through while still providing privacy. Hang curtain rods as close to the ceiling as possible and extend them 6-12 inches beyond the window frame on each side so panels can stack off the glass entirely when open.
Choose paint colors and finishes strategically
Light wall colors reflect more light, but the finish (sheen level) is equally important. Flat paint absorbs light; eggshell and satin finishes reflect it. For a dark room, choose eggshell at minimum on walls. Consider satin for trim and doors.
Stick to whites with warm or neutral undertones - soft whites with a hint of cream or greige tend to read as bright without feeling clinical or cold. For warm versus cool color guidance, see our guide to warm and cool paint palettes. Always test large paint swatches on your specific walls before purchasing gallons.
Position mirrors to reflect light sources
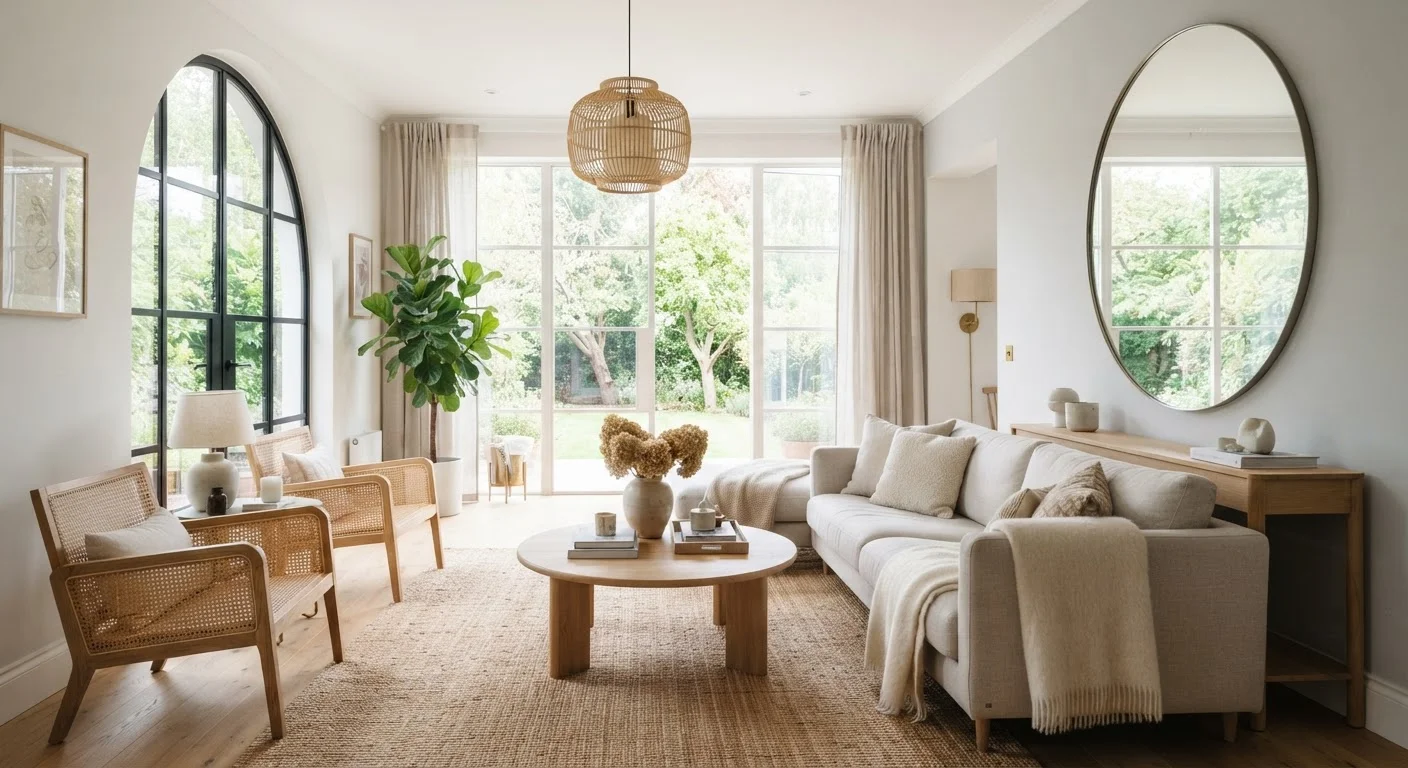
A mirror is most effective when it reflects an actual light source - a window, a lamp, or a skylight. Place a large mirror on the wall directly opposite your primary window so it bounces daylight back across the room. If that wall is unavailable, an adjacent wall at a slight angle works nearly as well.
Lean an oversized floor mirror in a corner to create the illusion of a second window. Multiple smaller mirrors grouped together can achieve a similar effect while adding visual interest. Avoid placing mirrors where they reflect dark corners, blank walls, or cluttered surfaces - you'll only amplify the darkness.
Introduce light-reflective surfaces and materials
You don't need to repaint every surface to gain reflectivity. Swap out matte-finish furniture for pieces with lacquered, glass, or metallic surfaces. A glass-topped coffee table, a side table with brass legs, or a glossy lacquered console can each scatter light meaningfully into adjacent areas.
Light-colored area rugs - especially those with a subtle sheen like wool or polished cotton - reflect ceiling light back upward, which darker rugs absorb. Keep floors as light as practical. For more ideas on reworking a compact space, see our article on arranging furniture in tight spaces.
Layer artificial lighting to supplement daylight
When natural light is genuinely limited - north-facing rooms, interior hallways, rooms with small windows - artificial lighting becomes the primary tool. Avoid relying solely on a single overhead fixture, which creates flat, shadow-heavy illumination. Instead, use floor lamps, table lamps, and wall sconces at varying heights to fill the room evenly.
Choose bulbs with a color temperature between 2700K-3000K for warm, natural-feeling light, or 4000K if you prefer a crisper daylight quality. Bulbs with a high CRI (color rendering index of 90+) render colors accurately so your carefully chosen paint and furnishings look their best.
Don't Skip the Ceiling
Ceilings are the largest single reflective surface in any room, yet they're frequently painted a flat, dingy white by default. Choosing a bright white with a matte or eggshell finish on the ceiling - even if walls stay a deeper shade - can dramatically open up the space. A yellowed or off-white ceiling absorbs more light than most people realize.
If you're curious about bolder approaches to color - such as painting all surfaces a single hue or using a fully neutral base - our overview of color drenching versus neutral base design explains the trade-offs for each method. And if you'd like to bring living greenery into a low-light space without sacrificing plant health, see our guide to low-light indoor plants.
Layer Your Artificial Lighting
When natural light is genuinely scarce - north-facing rooms, basement spaces, interior hallways - artificial lighting does the heavy lifting. Use multiple sources at different heights rather than relying on a single overhead fixture. See our guide to layered lighting for a practical breakdown of ambient, task, and accent light.
Common interior design myths - such as the idea that dark rooms need dark, cozy colors - can actually steer you in the wrong direction. For a myth-busting perspective on decorating decisions, see decorating myths that lead homeowners astray.
Cool Paint Tones Can Backfire in Low-Light Rooms
Very cool grays and blues look crisp in well-lit showrooms but can feel cold and gloomy in a north-facing room with limited sun. Test any paint color as a large swatch on your actual wall and observe it at multiple times of day before committing to a full room application.