

Key Takeaways
Why Mulching Matters More Than Most Gardeners Realize
Mulch is one of the hardest-working tools in a gardener's arsenal, yet it's routinely applied the wrong way. Done correctly, a layer of mulch moderates soil temperature, retains moisture, suppresses weeds, and - in the case of organic materials - feeds the soil as it breaks down. Done incorrectly, it invites rot, harbors pests, and slowly suffocates the very plants it's meant to protect.
The good news is that correct mulching isn't complicated. It mainly comes down to choosing the right material, applying the right depth, and knowing exactly where not to put it. If you've ever wondered why your mulched trees look stressed or your beds feel perpetually soggy, the answers are usually found in those three areas.
For context on building healthy soil beneath your mulch layer, see our guide to soil amendments every gardener should understand.
Choosing the Right Mulch for Your Situation
Mulch falls into two broad categories: organic and inorganic. Organic mulches - shredded bark, wood chips, straw, pine needles, and shredded leaves - break down over time, adding organic matter to the soil below. Inorganic options like gravel or rubber chips don't decompose, which means they won't improve soil structure, though they can be appropriate in specific applications like driveways or rock gardens.
For most planting beds and around trees, organic mulch is the preferred choice among extension horticulturalists across the US. Wood chips and shredded bark are widely available, long-lasting, and effective at moisture retention. Straw works well in vegetable gardens. Pine needle mulch - sometimes called pine straw - is a natural fit for acid-loving plants like blueberries and azaleas.
Choose organic mulch for planting beds and around trees whenever possible.
Organic materials like wood chips and shredded bark improve soil structure and fertility as they break down, offering benefits that inorganic alternatives simply cannot provide. This builds long-term soil health rather than just surface protection.
Apply mulch at a consistent depth of 2-4 inches across the entire bed.
Shallow mulch loses most of its weed-suppression and moisture-retention value. Excessively deep mulch blocks water penetration and creates pest habitat. The 2-4 inch range is where benefits peak without creating new problems.
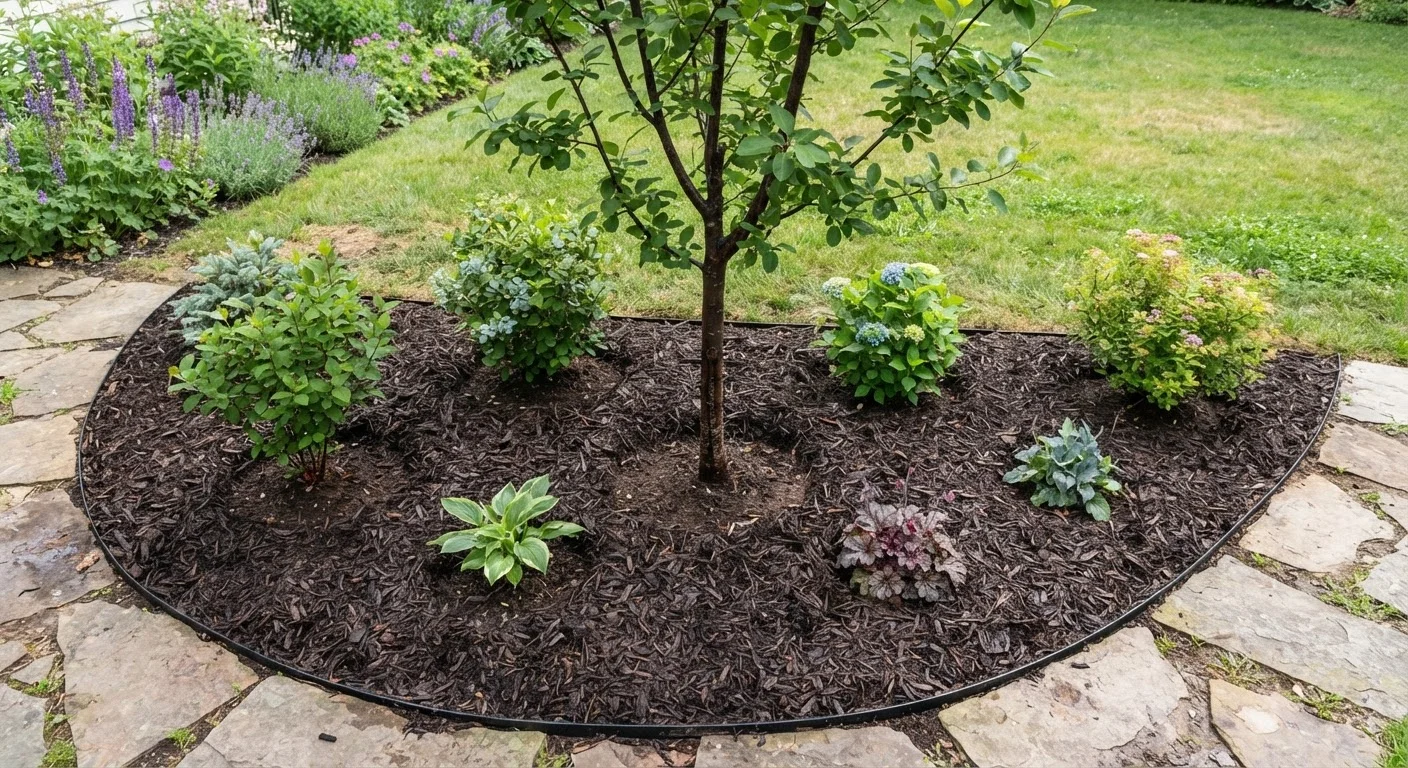
Maintain a 3-6 inch clear gap between mulch and all tree and shrub trunks.
Bark tissue is not adapted to prolonged moisture contact. Mulch piled against trunks traps dampness, promotes fungal disease, and can cause girdling roots - all of which weaken or kill trees over time.
Fluff and refresh existing mulch rather than continuously layering new material on top.
Repeated topping without disturbing old mulch creates a compacted mat that repels water and reduces gas exchange in the soil. Raking breaks up that crust and extends the life of existing material.
Extend mulch rings around trees outward toward the drip line, not just close to the trunk.
Tree roots extend far beyond where most people mulch. Wider coverage protects a greater portion of the root zone from compaction, temperature extremes, and moisture loss.
One note: dyed or treated wood products vary in quality. Stick with materials from known sources where possible, and be especially cautious with recycled wood mulch that may contain treated lumber, which can introduce unwanted compounds into your soil.
The Right Depth: Not Too Shallow, Not Too Deep
Depth is where many well-intentioned gardeners go wrong. The sweet spot for most mulch applications is 2 to 4 inches. At that depth, mulch retains soil moisture effectively, insulates roots from temperature swings, and blocks most weed seeds from germinating.
2-4 in
Optimal mulch depth for most planting beds
Cooperative Extension programs across multiple US universities consistently recommend this range for moisture retention and weed suppression without causing root suffocation.
3-6 in
Minimum clear gap needed between mulch and tree trunks
Arboricultural guidelines from organizations such as the International Society of Arboriculture recommend keeping mulch away from bark to prevent rot and pest damage.
Less than 2 inches and you lose most of the weed-suppression benefit - light penetrates easily and seeds sprout through. More than 4 inches creates problems in the other direction: it can prevent rainfall from reaching the soil, create anaerobic conditions that harm roots, and become a hiding place for slugs, voles, and other pests.
A common mistake is adding fresh mulch each season without removing or disturbing the old layer. Over years, this builds up what's sometimes called a "mulch mat" - a dense, compacted layer that water can no longer penetrate easily. Before refreshing, rake and fluff existing mulch. If it's still in decent shape, a light top-up may be all you need.
The Single Biggest Mulching Mistake: Volcano Mulching
Walk through almost any suburban neighborhood and you'll spot it: mulch piled high against tree trunks in a cone shape, sometimes 8-10 inches deep right at the base. This practice, known as volcano mulching, is one of the most widespread - and damaging - landscaping errors in American yards.
When mulch stays in contact with bark, it traps moisture against tissue that is not designed to stay wet. This creates conditions favorable to fungal rot, bacterial decay, and insect pests. Over time, it can also encourage girdling roots - roots that grow back toward the trunk through the mulch layer and eventually constrict the tree's vascular system.
The correct approach is sometimes called a "mulch donut" rather than a mulch volcano. Keep a clear, dry gap of 3 to 6 inches between the mulch ring and the actual trunk. The mulch ring itself can extend outward toward the drip line of the tree - the wider, the better for root health - but it should taper off at the edges rather than pile up at the center.
This is a point that common gardening myths often get wrong, so it's worth double-checking your current setup if you're unsure.
Quick-Start Steps and Seasonal Timing
Mulching can be done almost any time the ground isn't frozen, but two windows tend to produce the best results: spring, after soil has warmed but before summer heat peaks, and fall, to insulate roots before winter. If you're doing fall prep, mulching is a key step - see the full fall garden prep checklist for everything else to tackle before the first frost.
If you're working with raised beds, keep in mind that mulching principles still apply - though the smaller soil volume in a raised bed means moisture dynamics differ somewhat. For a broader look at bed types, our article on raised beds vs. in-ground planting covers the trade-offs in detail.